AWS EC2로 Spring Boot 배포하기
1. AWS 인스턴스 생성
1-1. 프리티어 생성
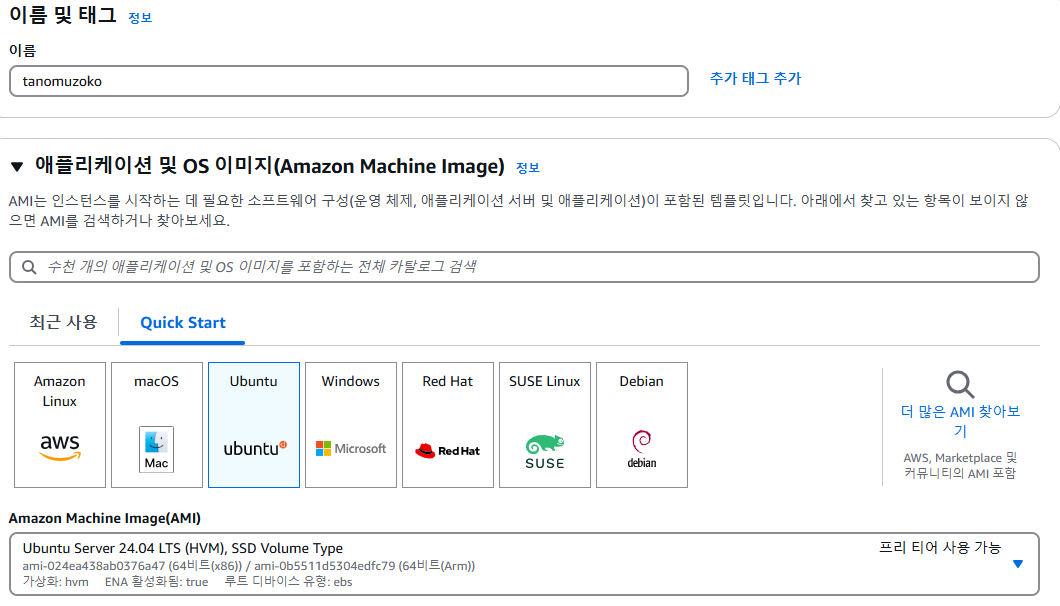
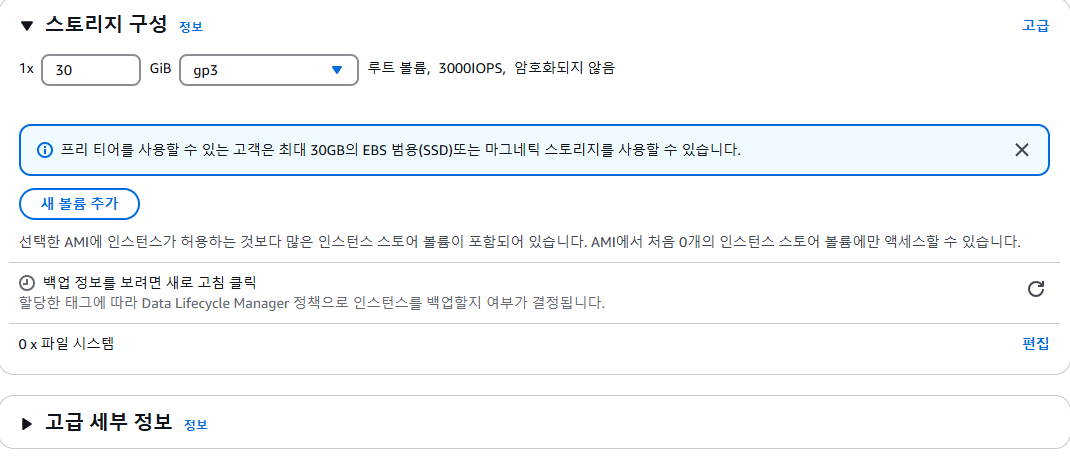
스토리지는 30GIB까지 공짜임
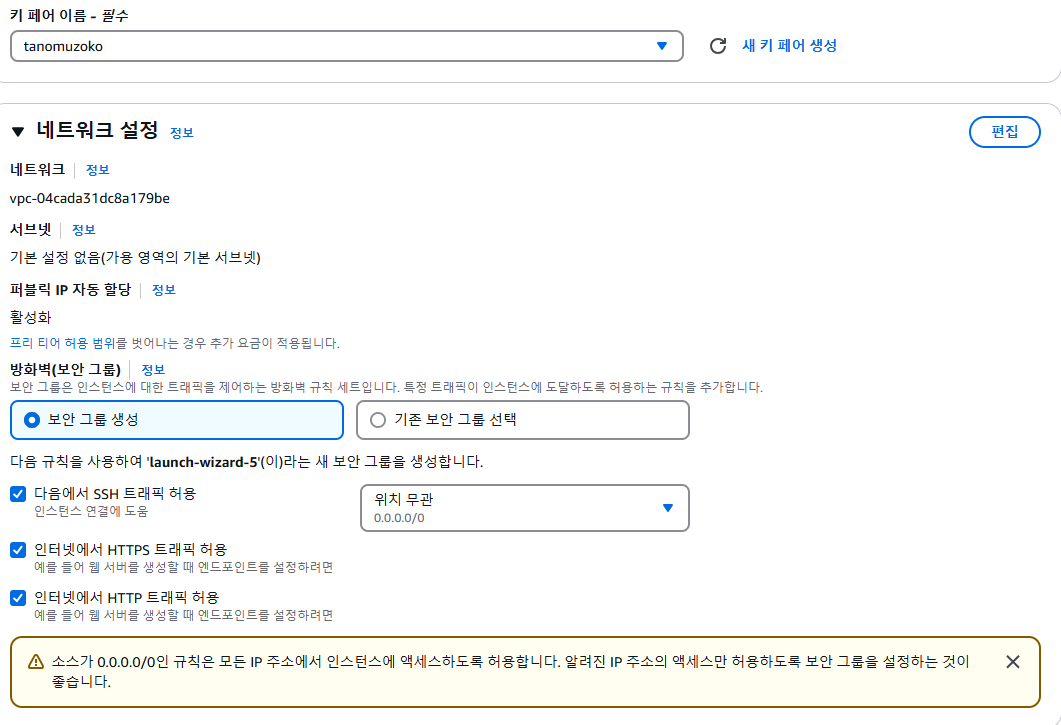
1-1. 보안그룹 설정
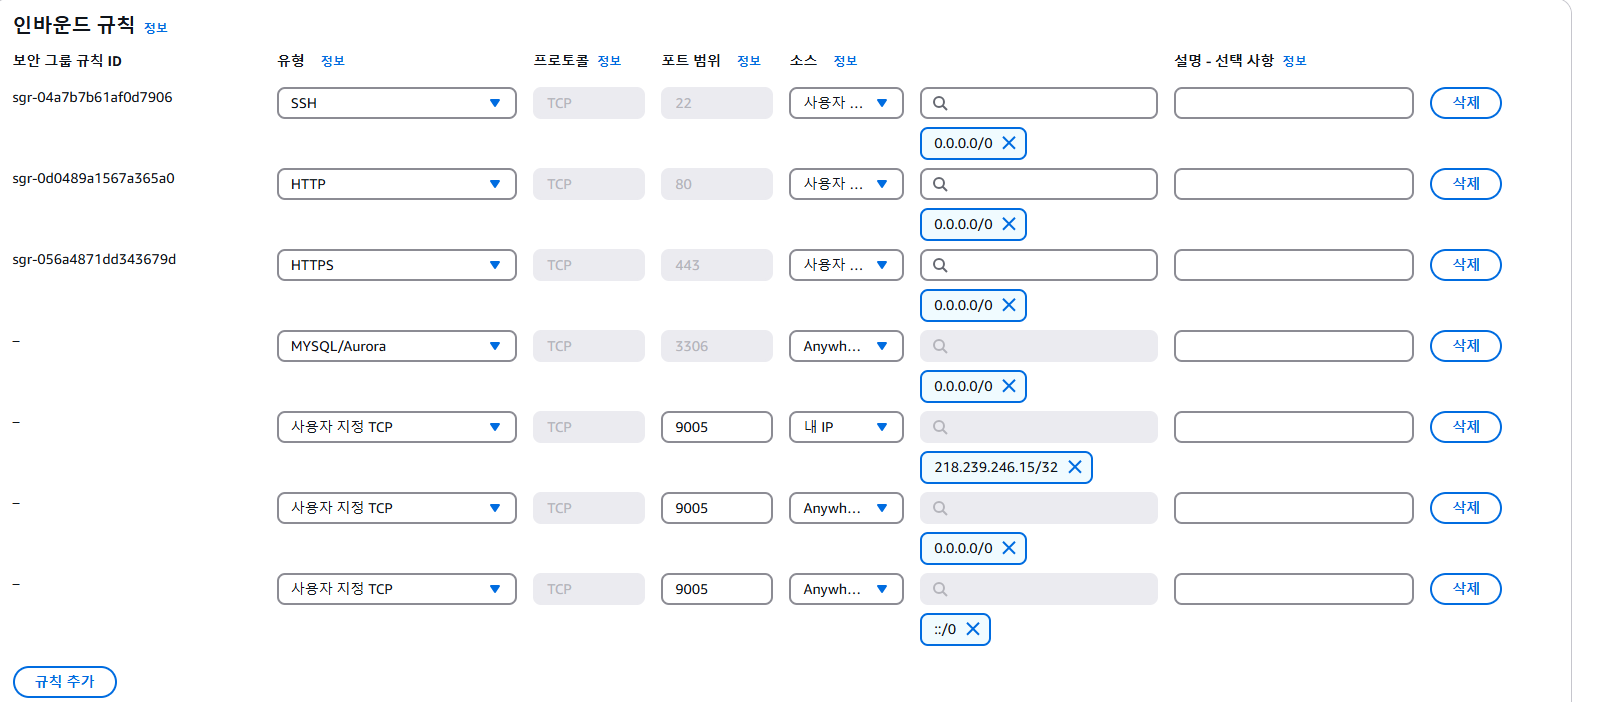
SSH : 원격 접속
HTTP / HTTPS : 웹 접근 여부
DB : Mysql 3306 포트 및 외부접속 허용
사용자 지정포트 : 9005 → 프로젝트 설정 포트 외부접속
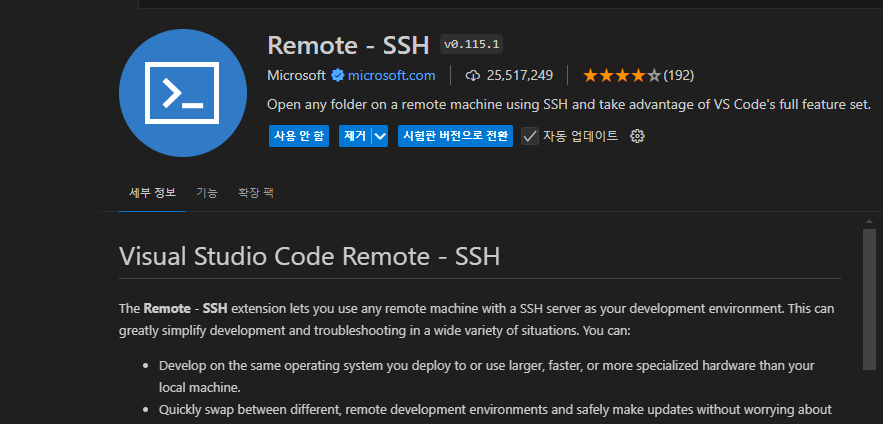
2. VSCODE 원격접속
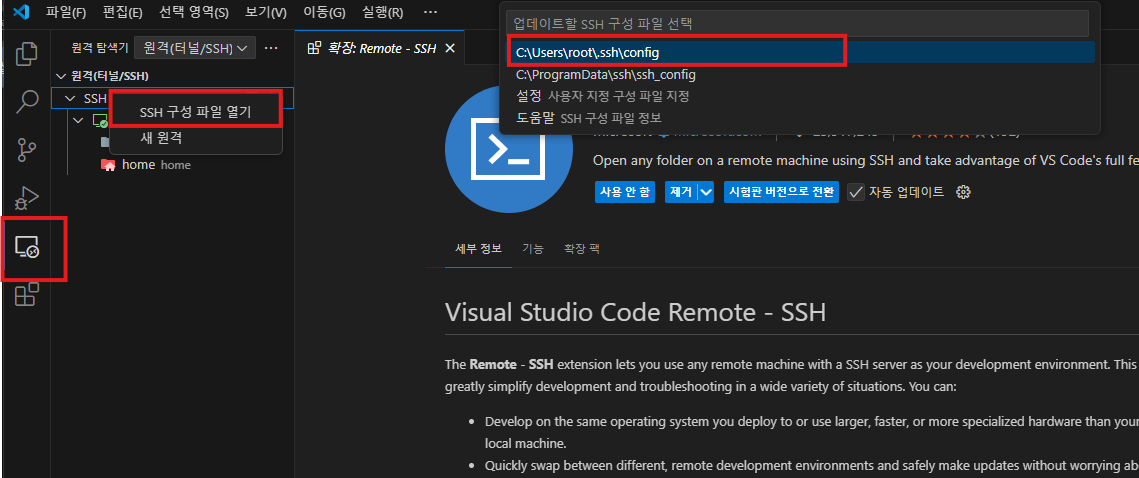
Read more about SSH config files: https://linux.die.net/man/5/ssh_config
Host tanomuzoko HostName 13.209.6.74 User ubuntu IdentityFile C:/Users/user/.ssh/tanomuzoko.pem
3. 패키지 설치
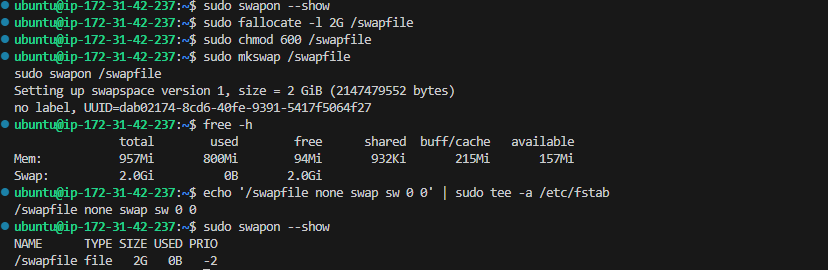
3-0 EC2 RAM SWAP
sudo swapon –show #SWAP 확인 sudo fallocate -l 2G /swapfile #SWAP 파일 생성 sudo chmod 600 /swapfile sudo mkswap /swapfile
SWAP은 최대 기존 RAM에 2배만큼만 하는게 성능이 가장 좋음 프리티어는 1G라서 2G로 SWAP 함
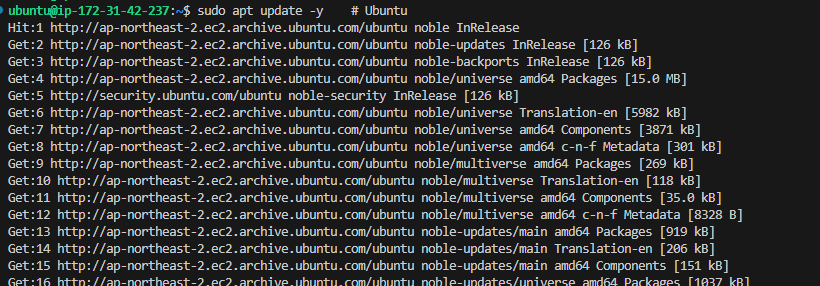
3-1 시스템 업데이트
sudo apt update -y # Ubuntu
3-2 Git 설치 및 원격 SSH Clone
sudo apt install git -y # Ubuntu git –version #버전확인
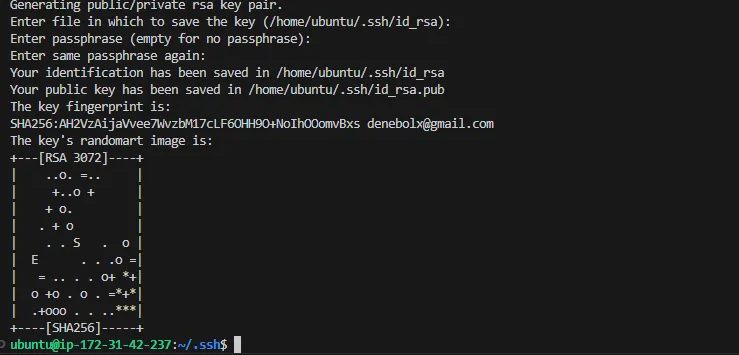
Git SSH Key 생성
cd ~/.ssh ssh-keygen -t rsa -C github계정 메일(example@github.com)
SSH Key GitHub 등록
vi id_rsa.pub
github -> setting -> SSH and GPG keys 탭으로 이동후 new SSH key 버튼을 클릭
id_rsa.pub의 내용 붙여 넣고 키등록

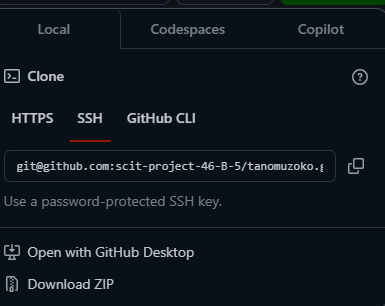
SSH Clone
프로젝트 SSH 해서 주소 복사
키 신뢰 여부 : yes

3-3 JDK 설치
1
sudo apt install openjdk-17-jdk -y            # Ubuntu
3-4 DB설치(MySQL) 및 설정
1
sudo apt install mysql-server -y    # Ubuntu
MySQL 실행 및 설정
sudo systemctl start mysqld sudo systemctl enable mysqld mysql_secure_installation
- 루트 비밀번호 설정
- 익명 사용자 제거
원격 접속 허용(필요 시)
mysql -u root -p CREATE DATABASE your_db; CREATE USER ‘your_user’@’%’ IDENTIFIED BY ‘your_password’; GRANT ALL PRIVILEGES ON your_db.* TO ‘your_user’@’%’; FLUSH PRIVILEGES;
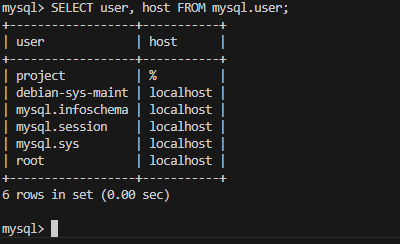
SELECT user, host FROM mysql.user;
sudo 권한없이 mysql 접속 안하면 스프링부트에서 디비안붙음 ALTER USER ‘root’@’localhost’ IDENTIFIED WITH mysql_native_password BY ‘새로운비밀번호’; FLUSH PRIVILEGES;
- mysql -u -root -p : Mysql 접속 안되면 sudo 권한으로 해볼것
- 프로젝트 DB 생성
- 외부 접속 유저 생성
- 외부 접속 유저 권한 부여
- 끝
생성 유저 조회
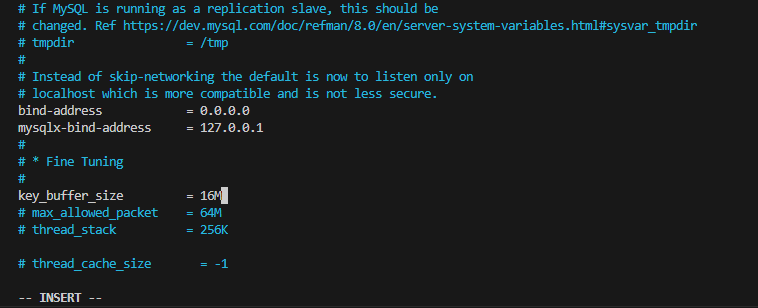
sudo vi /etc/mysql/mysql.conf.d/mysqld.cnf sudo systemctl restart mysql
Mysql 외부접속 허용 bind-address 0.0.0.0 으로 변경 저장 → esc누르고 wq! 엔터
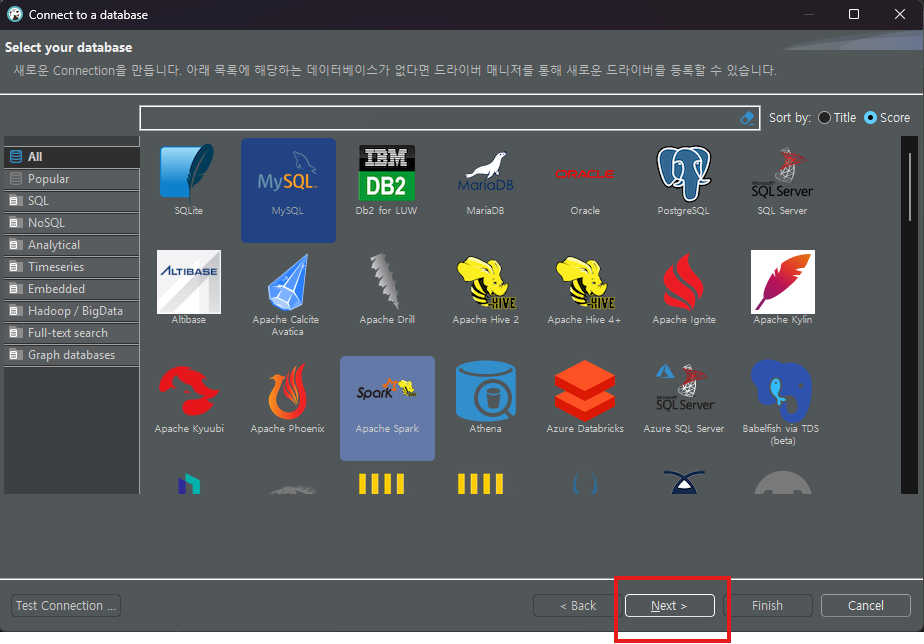
3-5 AWS DB외부 접속
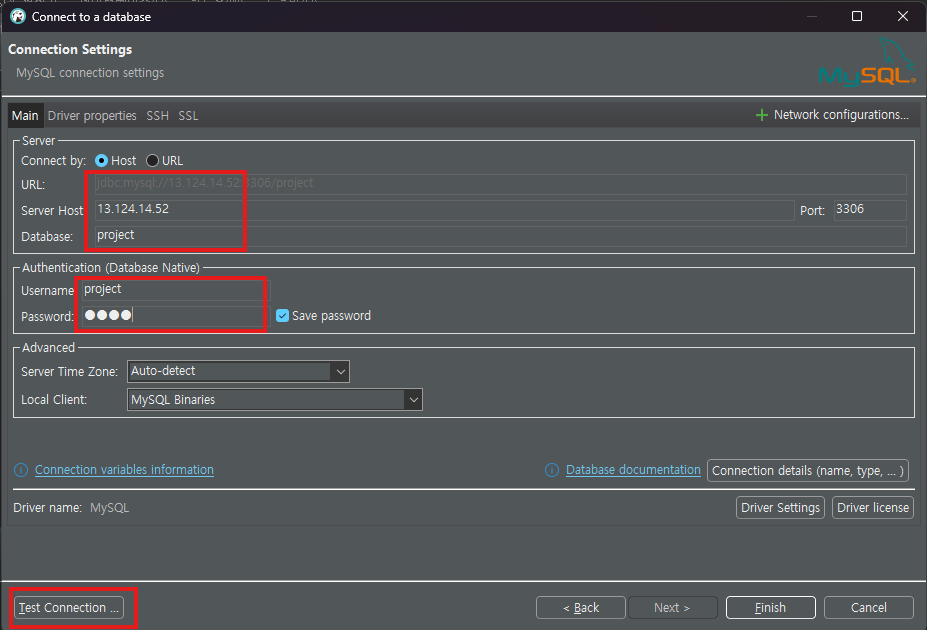
디비버 커넥션 선택에서 Mysql 선택
정보 입력
host : EC2 퍼블릭 IP
database : project
username : project
password : scit
### 에러 ) 접속 에러 나는 경우 user 접속 권한 변경
현재 인증 플러그인 확인
SELECT user, host, plugin FROM mysql.user WHERE user = ‘your_user
- 만약
plugin이caching_sha2_password라면, 이를 변경해야 할 수 있습니다. - 비밀번호 인증 방식을 변경
ALTER USER ‘your_user’@’%’ IDENTIFIED WITH mysql_native_password BY ‘your_password’; FLUSH PRIVILEGES;
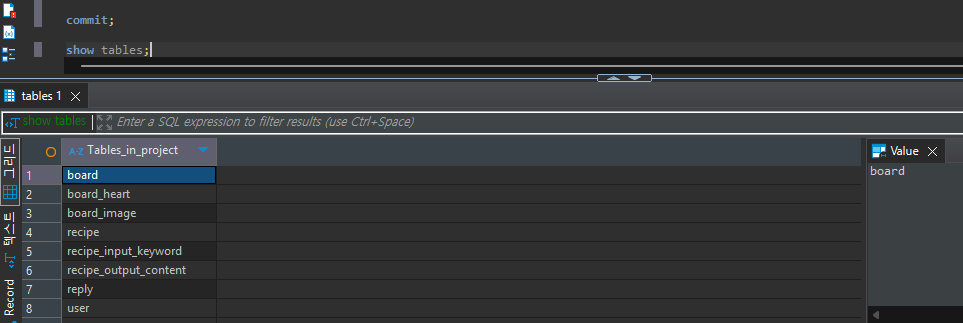
쿼리 확인
- 만약
3-6 Spring Boot 빌드
1
2
3
4
chmod +x gradlew         # clone 받은 폴더에서 빌드 권한 부여
./gradlew build          # 빌드 실행

sudo apt install redis-server #redis설치

3-7 nginx 설치 및 설정
1
sudo apt install nginx -y    # Ubuntu

sudo vi /etc/nginx/nginx.conf
1
2
3
4
5
6
7
8
9
10
11
12
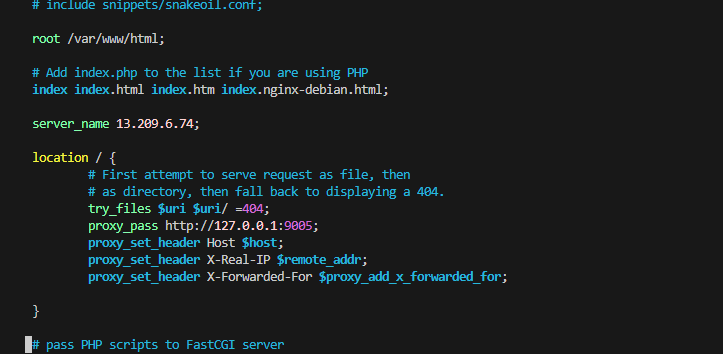
hhtp 블록에 아래 내용 추가
server {
listen 80;
server_name 13.111.6.14; #Ec2 ip
location / {
proxy_pass http://127.0.0.1:9005; # Spring Boot 애플리케이션 포트에 맞게 수정
proxy_set_header Host $host;
proxy_set_header X-Real-IP $remote_addr;
proxy_set_header X-Forwarded-For $proxy_add_x_forwarded_for;
}
}
sudo nginx -t # 설정 점검 sudo systemctl restart nginx # nginx 재시작
sudo /etc/nginx/sites-available/default
아래내용 추가
sudo nginx -t
nginx 설정 테스트

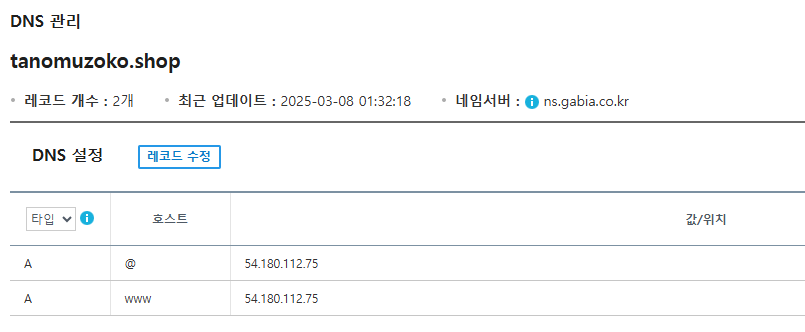
3-9 도메인(가비아) DNS 적용
EC2 퍼블릭 IP DNS 설정에 추가
3-9 SSL 적용 (Let’s Encrypt)
1
2
3
4
5
6
7
8
sudo apt install certbot python3-certbot-nginx -y    # Ubuntu


sudo certbot --nginx -d your-domain.com


echo "0 0 * * * root certbot renew --quiet" | sudo tee -a /etc/crontab
- certbot install
- 구매한 도메인 SSL 발급
- SSL 자동갱신 설정

1
2
3
4
5
6
7
8
9
10
11
12
13
14
sudo vi /etc/nginx/nginx.conf

hhtp 블록에 아래 내용 추가
server {
        listen 80;
        server_name 13.111.6.14; #Ec2 ip

        location / {
            proxy_pass http://127.0.0.1:9005;  # Spring Boot 애플리케이션 포트에 맞게 수정
            proxy_set_header Host $host;
            proxy_set_header X-Real-IP $remote_addr;
            proxy_set_header X-Forwarded-For $proxy_add_x_forwarded_for;
        }
      }
sudo nginx -t # 설정 점검 sudo systemctl restart nginx # nginx 재시작
3-10 애플리케이션 자동 실행 설정
sudo vi /etc/systemd/system/springboot.service
- 서비스 어플리케이션 파일 생성
1
2
3
4
5
6
7
8
9
10
11
12
13
14
15
[Unit]
Description=Spring Boot Application
After=network.target

[Service]
User=ec2-user
WorkingDirectory=/home/ec2-user/your-project
ExecStart=/usr/bin/java -jar /home/ec2-user/your-project/target/your-app.jar
SuccessExitStatus=143
Restart=always
RestartSec=10

[Install]
WantedBy=multi-user.target
systemd 데몬 리로드 (새로운 서비스 인식) sudo systemctl daemon-reload
서비스 시작 sudo systemctl start tanomuzoko
부팅 시 자동 실행 등록 sudo systemctl enable tanomuzoko
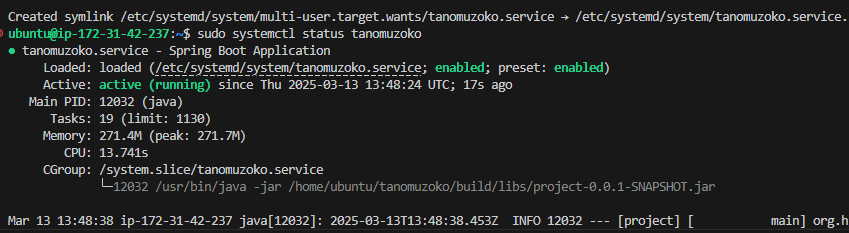
서비스 상태 확인 sudo systemctl status tanomuzoko
실시간 서비스 로그 확인 sudo journalctl -u tanomuzoko -f